PrestaShop CMS: manual installation guide for your online store
Do you want to install PrestaShop to launch your online store?
PrestaShop is a leading open-source ecommerce platform in France and a top CMS (content management system) for building ecommerce websites. It’s robust, feature-rich, reliable, accessible to everyone, and, most importantly, free to install. PrestaShop is used by both small businesses and large enterprises, and you can add thousands of modules to extend its functionality. Thanks to an active community, the platform is continually evolving.
Ready to get started? Follow this step-by-step installation tutorial to set up PrestaShop.
This article walks you through the manual installation process. Looking for a simpler and faster method? Check out our free video tutorials on the official PrestaShop training platform, where you’ll learn, step by step, how to install PrestaShop in one click with our hosting partners, Hostinger and Gandi.
Requirements before installing PrestaShop on remote hosting
Before you begin the PrestaShop installation for your future online store, you need to make a few key decisions and preparations: select a web host, choose a domain name, create a database, and install an FTP client (if your hosting provider doesn’t offer a file manager like cPanel) on your computer. These are necessary steps for uploading files to your remote server.
If you’re not yet familiar with these technical terms, don’t worry.
Everything is explained step by step in this installation guide, complete with screenshots.
If you’re not comfortable with manual installation, consider our turnkey solution, PrestaShop Hosted, which includes hosting and installation.
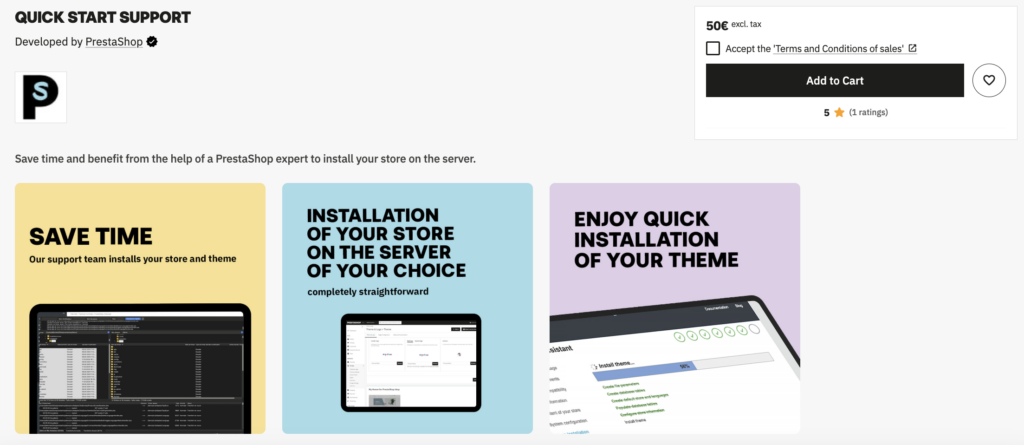
You can also get help with the Quick Start support pack offered by our official PrestaShop support team.
1. Download PrestaShop
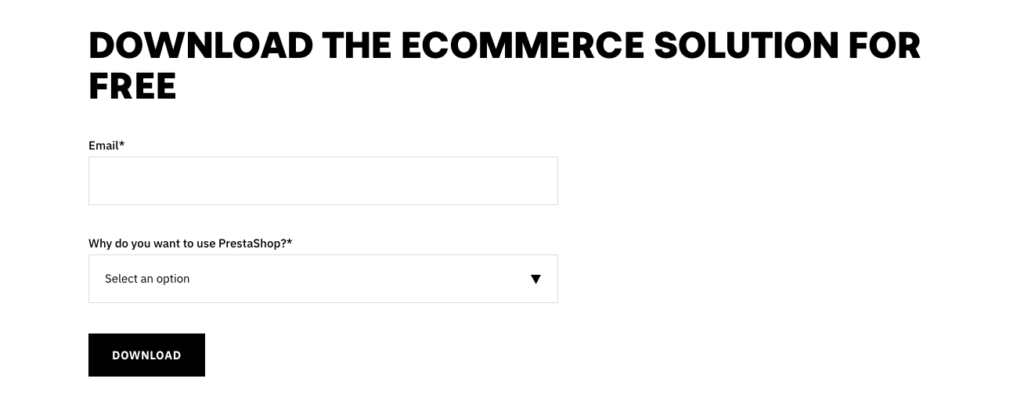
To start, simply download the installation files from the official website by clicking here.
Enter your email, profile, and your estimated store launch date, then click “Download” to get the ZIP file onto your computer.
Decompress the ZIP file:
- On Windows: Right-click the file, then select “Extract All.” Choose where to save the folder (by default, it will go where the ZIP file is), and click “Extract.”
- On Mac: Just double-click the ZIP file, and it will decompress automatically.
Once your files are downloaded and unzipped, you’re ready for the next step: choosing your hosting.
2. Choose your web hosting
A host is like a virtual storefront—it’s where all the files and information for your website (HTML, images, videos, and more) will be stored and published so people can find you online.
Every file uses storage space, so you need to select a quality host and the right type of hosting for your expected traffic and connections. More visitors mean your server must handle more activity. Make sure your host can provide fast loading times and good performance for your online store.
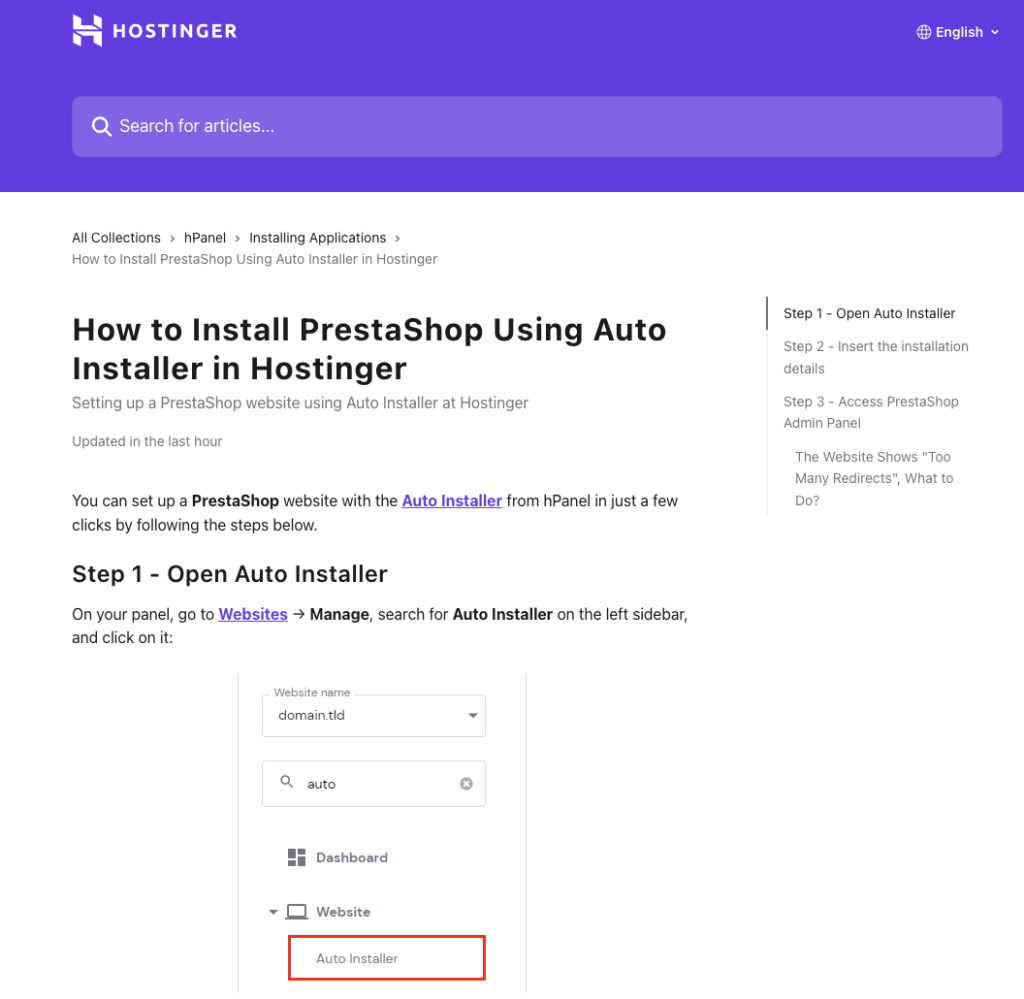
PrestaShop partners with Hostinger, a host that lets you install PrestaShop quickly with an automatic installer. You can host and configure your store in just a few clicks with Hostinger’s dashboard, streamlining the setup process.
You can also buy your domain name directly from Hostinger if you prefer to manage everything in one place.
Other options for hosting include Gandi, OVH Cloud, O2switch, LWS, PlanetHoster, and more.
Make sure your host is compatible with PrestaShop: Windows, Linux, or Unix compatibility, enough server memory (at least 64 MB RAM), a recent version of PHP (at least version 8), and MySQL (version 5 or higher).
After signing up, you’ll receive an email from your hosting service with the information you need to set up your site (FTP host, username, password, port, etc.). You can also find these details in your host’s admin dashboard.
3. Create your database (only if you don’t use Hostinger’s or your host’s AutoInstall option)
In your hosting admin dashboard (such as Hostinger, Gandi, or others), you’ll need to create a database (DB) to store and save all your site information (orders, customers, catalog, shipping, and so on).
How to create your database?
On Hostinger:
- Log in to your Hostinger account.
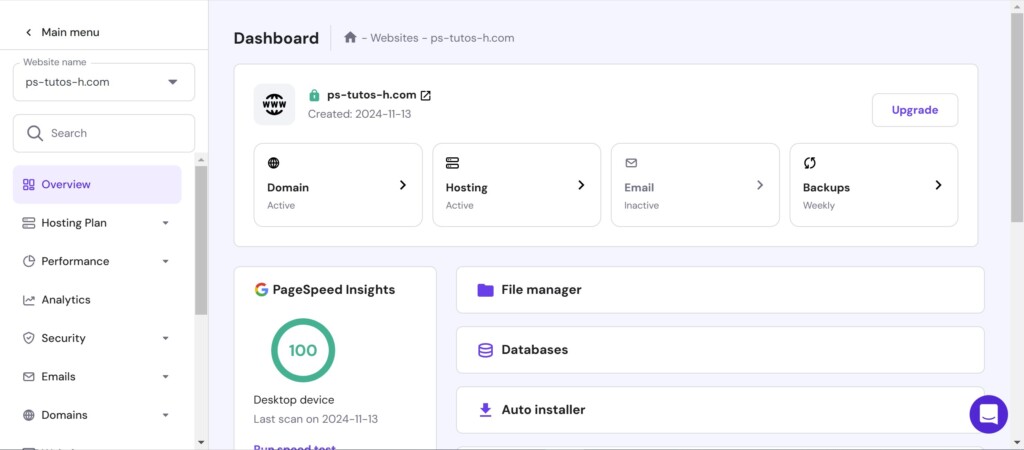
- Go to your hosting panel, and on the main page, click “Manage” under “Hosting.”
- Click “Databases.”
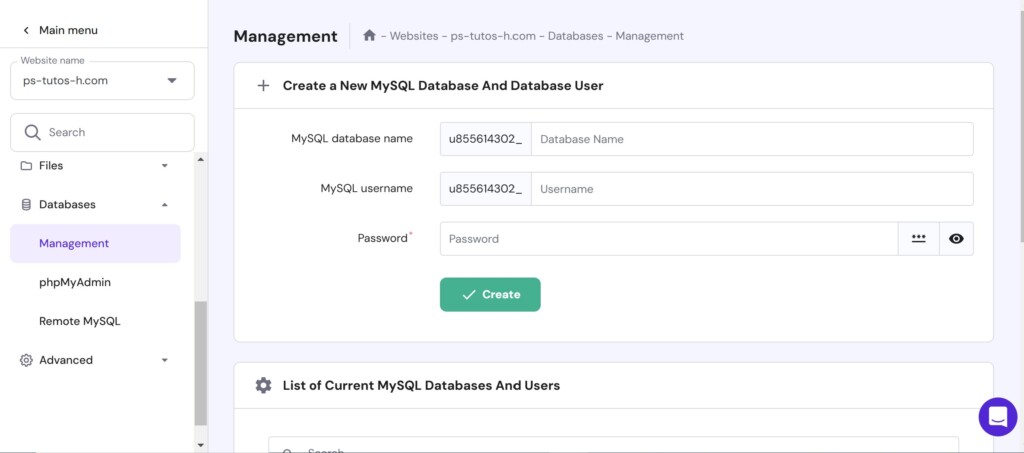
- Under “Create a New MySQL Database,” fill in the database name, username, and password (choose information you’ll remember).
- Confirm by clicking “Create.”
Your Hostinger database is now ready.
4. Choose and buy a domain name
Your domain name is important. It should reflect your business or brand identity, and its extension should match your geographic market. For example, it’s not recommended (for SEO reasons) to use a .co.uk extension if your audience is only in France.
The best domain name is short and as close as possible to your brand name, so customers can remember it. Whether you choose a fully branded domain or include keywords related to your business is up to you. It depends on your communication strategy and brand positioning.
- Examples of branded domains: carglass.fr, manomano.fr, fnac.com, sarenza.com, zalando.fr, giboire.com, darty.com, amazon.fr, verbaudet.fr…
- Examples of semi-branded domains: guedo-outillage.fr, blot-immobilier.fr, king-jouet.com…
- Examples of keyword-rich domains: promovacances.com, covoiturage.fr, maisonducafe.com…
To buy a domain, just visit your hosting provider’s website. You can do this when you first sign up, or later in your host’s admin panel.

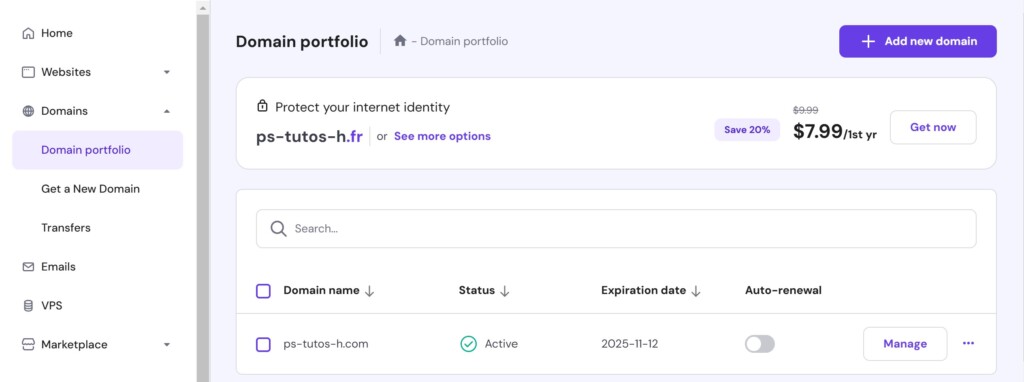
If you bought a domain during signup with Hostinger, you’ll see it in the “Domains / Domain Portfolio” section of your dashboard. If not, click “Add a Domain,” enter your chosen name, and search for its availability. If it’s available, you can purchase it; otherwise, you’ll need to pick another. Hostinger also offers an AI tool to suggest alternatives.
If you buy your domain from another provider, you’ll need to point your domain’s DNS servers to your new host, which requires some basic DNS management.
Now that you’ve chosen your domain, let’s move on to using an FTP client (unless you chose an auto-install option).
5. Using an FTP client
An FTP client (File Transfer Protocol) is a tool for transferring files between your computer and your web server. You’ll use it to upload your PrestaShop files to the server to begin installing the CMS.
You can check out our exclusive tutorial “Connect to a server via FTP” on PrestaShop Academy, as well as our dedicated Help Center article.
With most hosts (including Hostinger), you can use cPanel, a graphical admin dashboard, to upload PrestaShop files to your server.
- In your host admin interface, look for a “File Manager” or “cPanel” button.
- With Hostinger, click “Home,” then under “Hosting,” select “Manage.”
- On the next page, click “File Manager.”
- Open the “public_html” folder, then drag and drop the 4 PrestaShop installation files from your unzipped folder (from earlier steps) into this directory.
If your host doesn’t provide cPanel or you don’t have an FTP client:
- Download one. PrestaShop recommends FileZilla (FileZilla Client), a free tool for transferring all your PrestaShop files to your server.
- Once installed, connect to your server by filling in the requested fields (host, username, password, port)—these are sent by email or available in your host admin area (under FTP Accounts).
- If you don’t know your FTP password, set a new one from your host dashboard.
- If you see an “Unknown Certificate” warning, click OK.
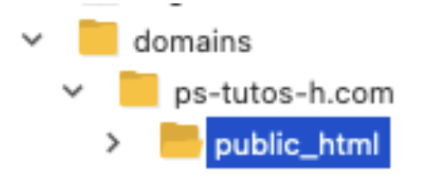
- After connecting, navigate to ‘domains’ in the bottom right, then your domain, then ‘public_html’.
- Drag and drop the PrestaShop installation files from your local folder into ‘public_html’ on the server.
Once all PrestaShop files are on your server via FTP or cPanel, go to your website’s URL in your browser. You should see the installation page.
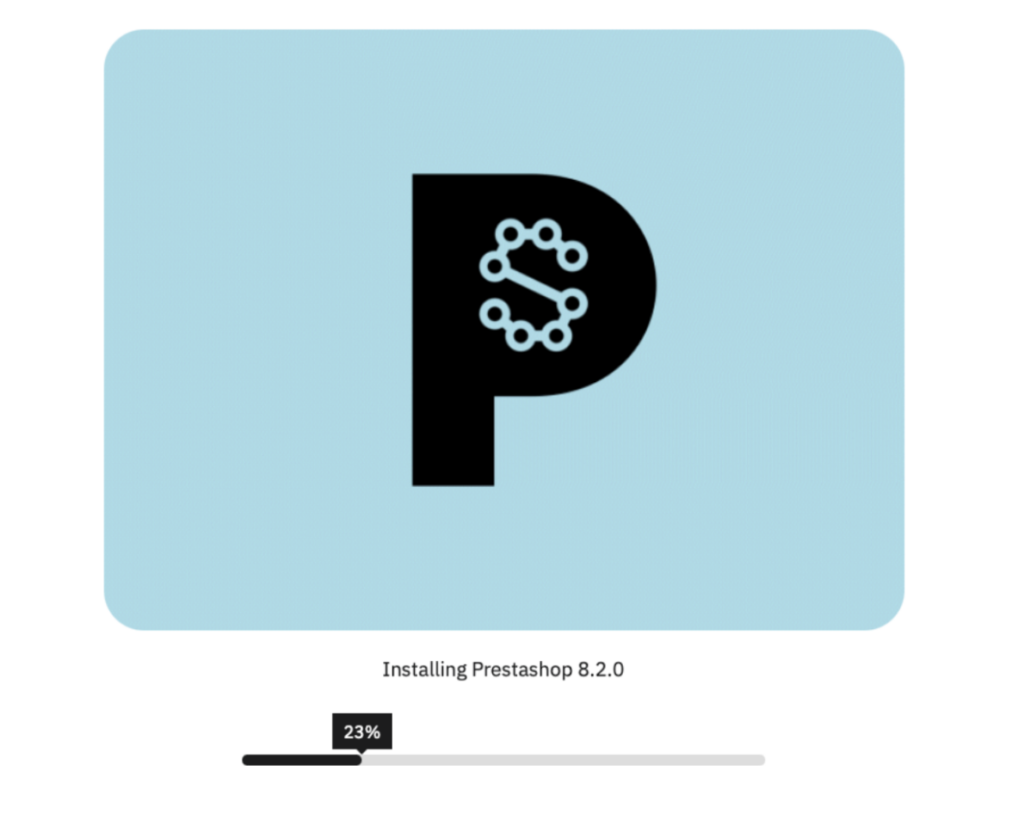
6. Launch & set up your PrestaShop installation
Now that the installation process has reached 100 percent, here’s what you should see when connected to your website:
By default, English is selected, but you can change the language from the dropdown menu.
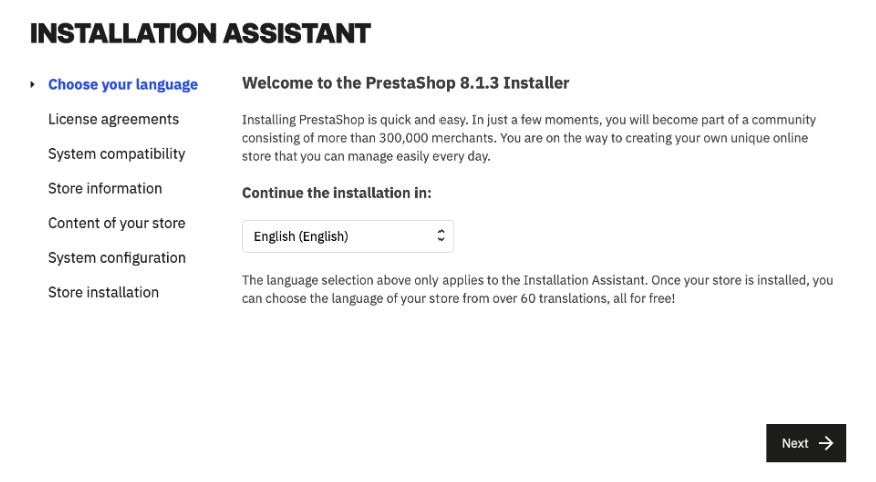
- Once you select your language, click “Next” to accept the license terms.

- Check the “I agree to the above terms and conditions” box, then click “Next.”
- If you land on the Information page, the compatibility test ran with no issues. If there’s a warning about compatibility, contact your host with the information displayed.
- With major hosts, you should not have compatibility issues.
Next, the setup wizard will ask for your site information:
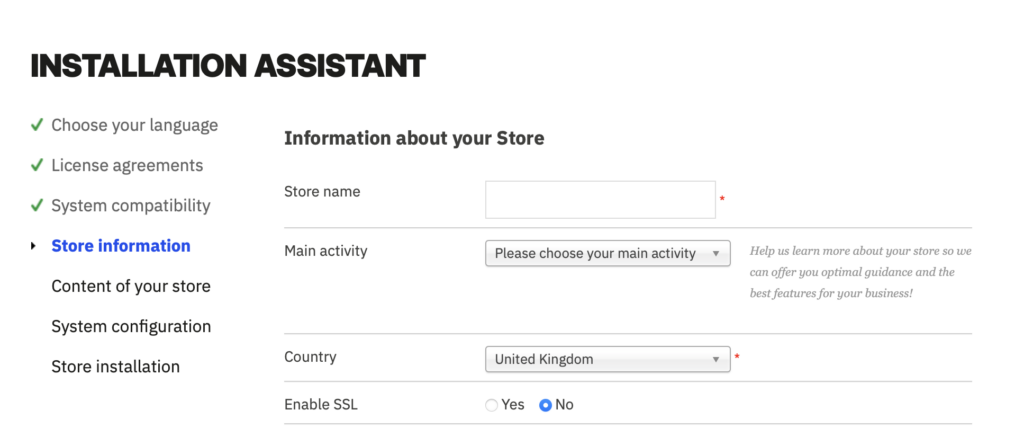

- Store name and country
- Enable SSL (strongly recommended)
- Your first and last name, email address (used for back office login)
- Set a strong password (again, this is for back office access)
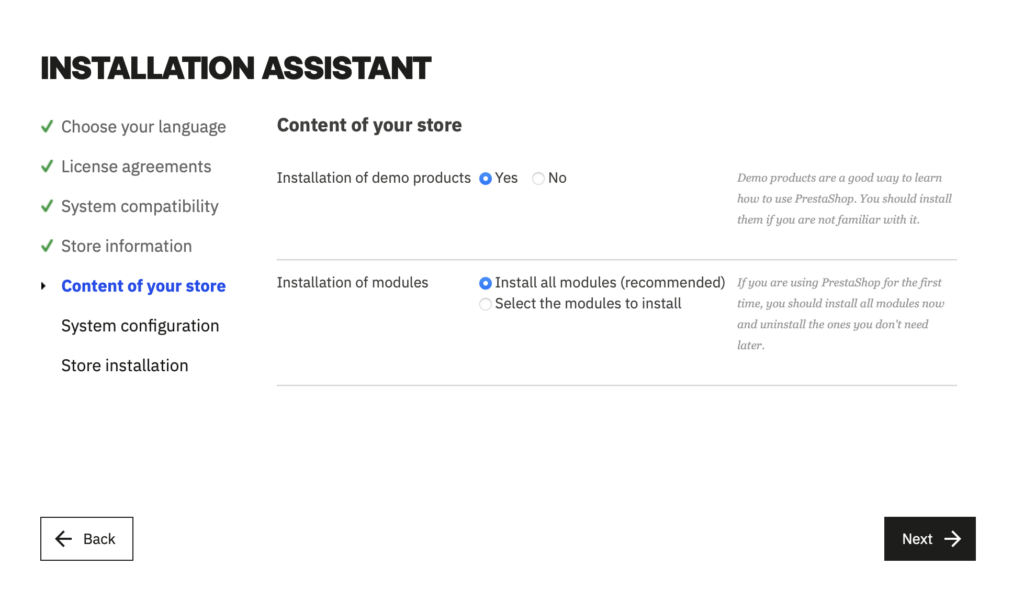
For the content step, choose whether to install demo products (optional but useful to explore PrestaShop, can be deleted later) and whether to install all modules (recommended) or only selected ones.
For system configuration, enter the database information you created earlier (database server address, database name, username, password, table prefix).
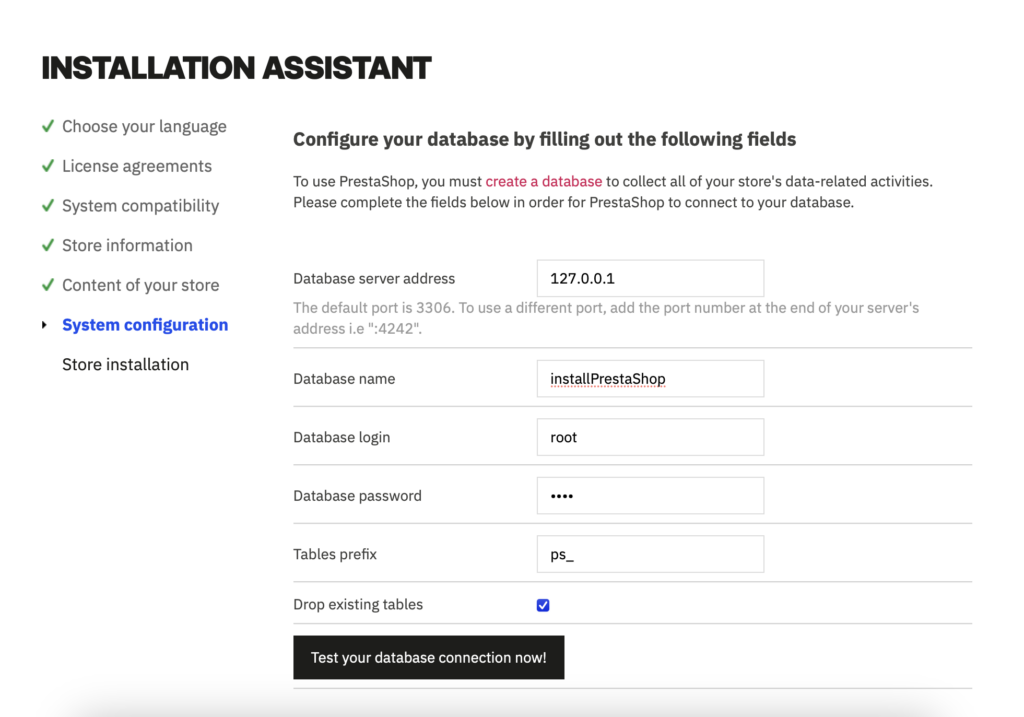
- On Hostinger, go to “Home / Databases” to find these details. If you forgot the password, you can reset it.
- Click “Test database connection.” If everything is correct, you’ll see a green message: “The database is connected.”
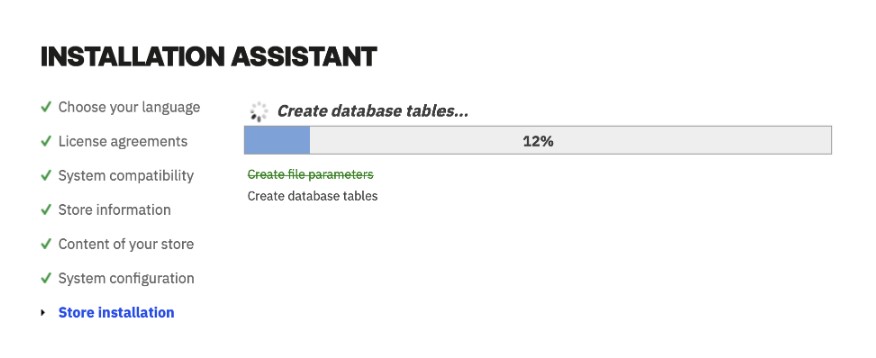
- Click “Next,” and PrestaShop will install your site (file settings, database tables, languages, modules, etc.).
At the end, you’ll see an installation success message.
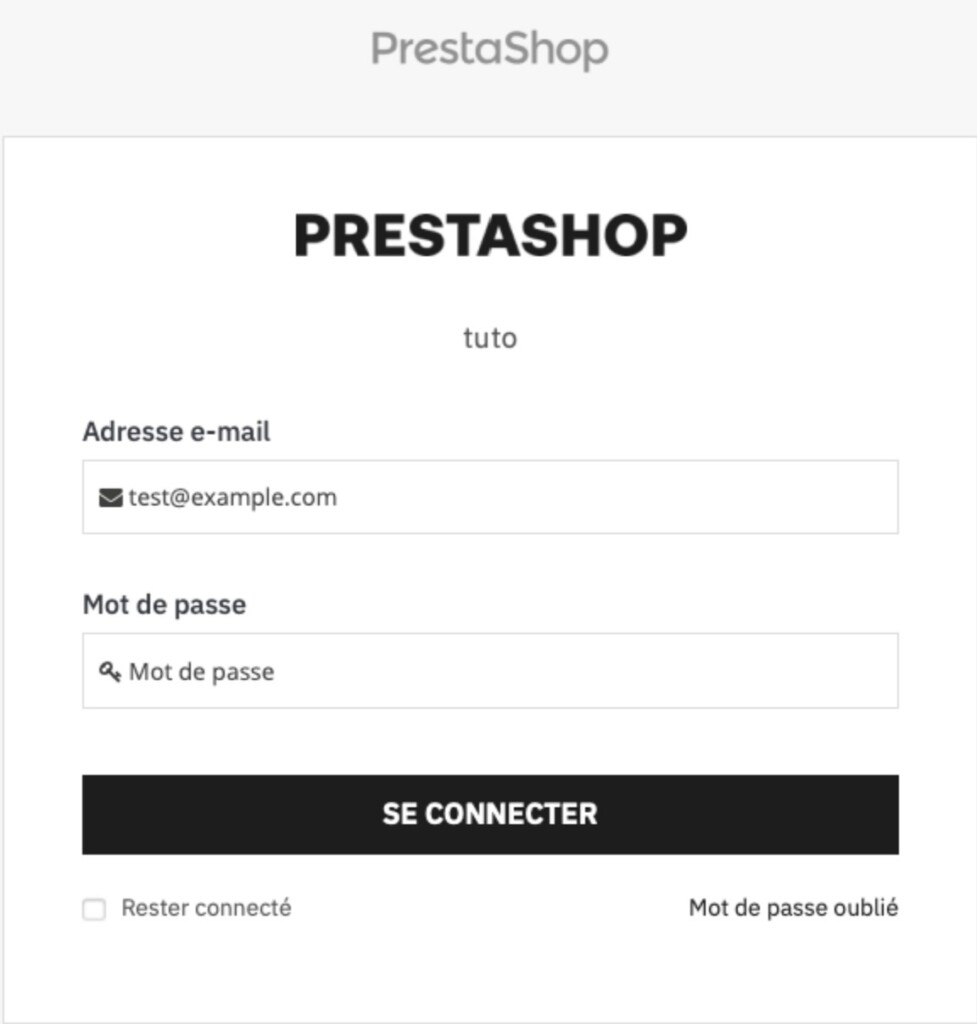
You can now access your back office (admin dashboard) using your chosen login or view your online site.
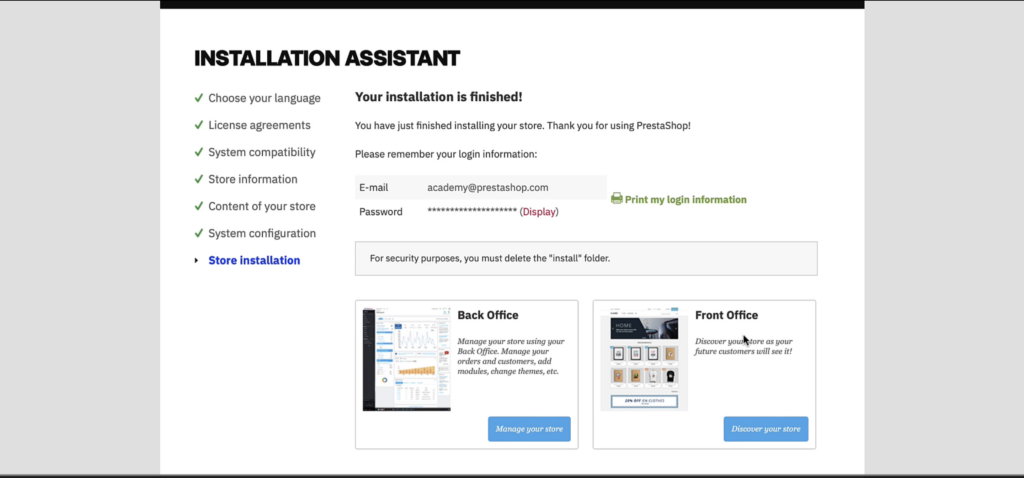
For security, you must manually delete the “install” folder from your PrestaShop files on your server.
- Open FileZilla or cPanel and delete the ‘install’ folder (“Right click / Delete”).
After removing the ‘install’ folder, refresh the back office login page. Your back office URL will be your domain, followed by the admin folder name.
If you ever forget the URL, log into the server via FileZilla or cPanel and look for the folder starting with “admin.” The back office URL is your domain followed by this folder name.
You can rename the /admin folder from FileZilla or cPanel to change your back office URL for added security (don’t use obvious names).
Congratulations, your PrestaShop site is ready! You can now start configuring it.
Check out our official PrestaShop resources for the next steps:
- Start live training: a step-by-step guide to creating your site, configuring essential features, and learning best practices for sales.
- PrestaShop e-learning platform with free video tutorials and advanced paid content.
- Help Center, which has articles for any questions you may have.
- Video tutorial: Installing PrestaShop with Gandi.